
STW War Story Part V
Furinkazan - The Ambition of Takeda
Mountain (3)
Chapter 12 Reunion
Autumn 1543
 |
Takeda's campaign of Kyushu started immediately. Takeda Nobutora made his step in Buzen, and Takeda Shingen marched on the hills in Hyuga. The plan was to suppress the local ronin army with numbers - and force them to retreat into the castle. This way, even if the total number of ronins were large, they could be torn down piece by piece. |
Spring 1544
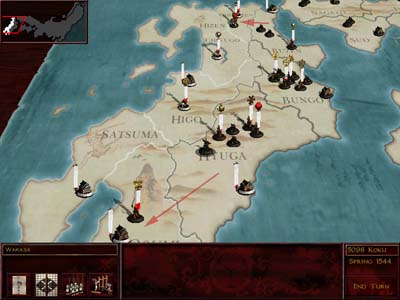 |
With more reinforcement arriving
from the north, Takeda Nobutora and Shingen advanced further into Kyushu
after the winter was over.
Takeda also received no resistance in Osumi and Chikuzen. |
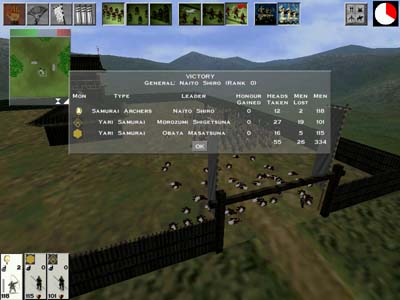 |
Aki : Meanwhile, Takeda Nobutora ordered a castle assault in Aki - the last resisting castle of Chugoku. This way the 360 men in Aki could also assist in the castle sieges left over. The previous Mori soldiers strived to survive, but they had little chance to face Takeda which was 6 times of their size. |
Summer 1544
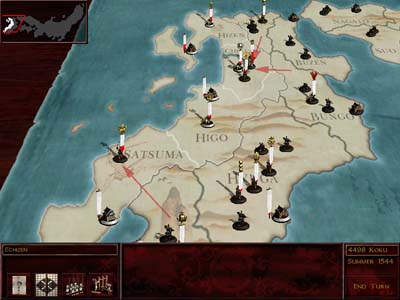 |
Takeda pushed forward again.
Takeda Shingen attacked Satsuma, and Takeda Nobutora attacked Chikugo.
There was a large number of army ended up in Hizen. Nobutora rather to face them on the flat land. If he attack Hizen first, even if he wins the rest of the army would end up in Chikugo. So far Takeda has rushed through Kyushu - none of the ronins dared to challenge the army that is as steady as mountain! |
Autumn 1544
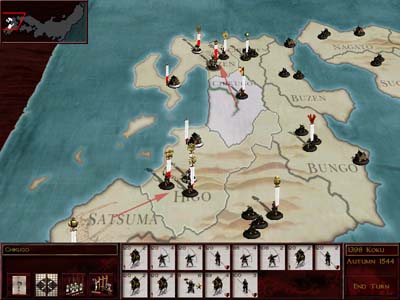 |
The final battles finally came.
Takeda Shingen was responsible for the ronins in Higo, while Takeda
Nobutora attacked Hizen with the largest army that Takeda ever had - a
full 16 units of 1640 warriors.
|
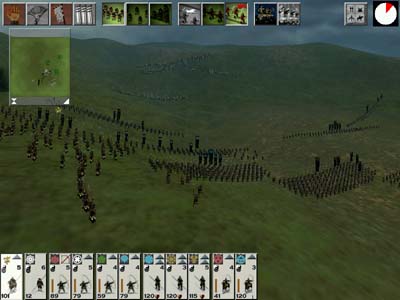 |
Higo : The ronins of Higo camped on the mountain far back. There was a passage on the left - that's where Takeda Shingen is going to send his cavalry to! |
 |
Although the enemy's arrows were
more accurate due to their heights, they could not resist the flanking of
the entire Takeda cavalry.
The enemy were on the run; those on the other side also lost their will to fight in a short time. |
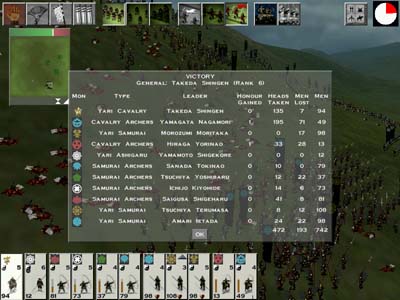 |
The eighth victory of Takeda
Shingen - also the last. With again a large number of kills (79%), the
killer general reached an average of 566 Kill every battle, and
himself took averagely 7 heads from the enemy each time!
So everybody would be watching the result of the final battle... |
 |
Hizen : The final battle in Hizen was truly of great cast - more than 3000 soldiers on the scene. Takeda was largely yari cavalry - while the enemy has a significant number of yari samurai and high honored archers. What would be the plan of Takeda Nobutora? |
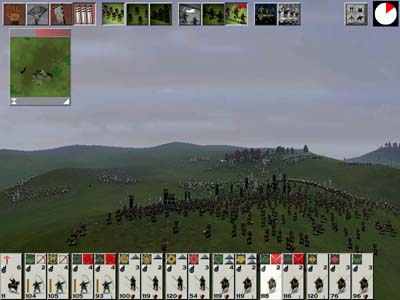 |
Nobutora divided the total force
into three blocks, left, center, and right. The first block of yari
cavalry will advance into the left flank, luring the enemy to send yari
samurai over.
While the enemy was lured, the central yari samurai (group 2) will advance and try to block the enemy yari samurai on the left, with the supporting flanks of yari cavalry on the back. The right flank will be consisted of purely yari cavalry, flanking the yari-less enemy as soon as the odds are good. The two army finally engages. The left flank yari cavalry had successfully lured a large number of enemy yari to the left! |
 |
Yet the enemy had more yari
samurai in reserve! Takeda Nobutora ordered all Takeda yari samurai to
charge over first, but still some yari samurai were forced to face the
enemy yari directly...
But under the massive cavalry of Takeda Nobutora, Takeda's men still outnumbered the enemy yari greatly in these small regions. A lot of enemy archers were stayed at the back! On the right, the yari cavalry has been given the command of charge-at-will. The cavalry rushed into enemy archers! |
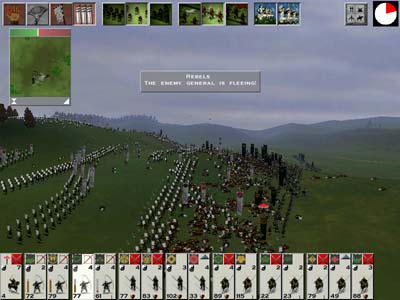 |
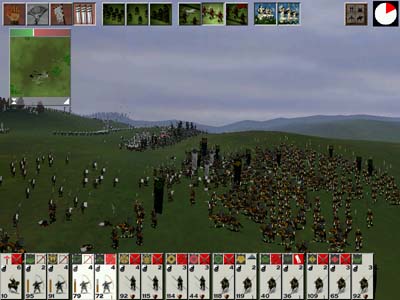
The enemy general came to the
center - but he could not stop Takeda from advancing on the right (distant
side in the snapshot). With the yari cavalry flanking the ronins at
center, more and more soldiers were on the run!
Finally the enemy taisho decided to flee! |
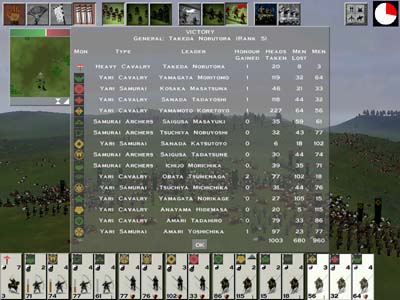 |
The chase was spectacular, even
if the enemy were already close to the exit.
Killing a record breaking of 1003, Takeda ended their national campaign with nearly 1700 corpses on the field of Hizen. Takeda Nobutora also raised one rank (5 to 6) after the battle - but nobody had the power to challenge the formidable Takeda! |
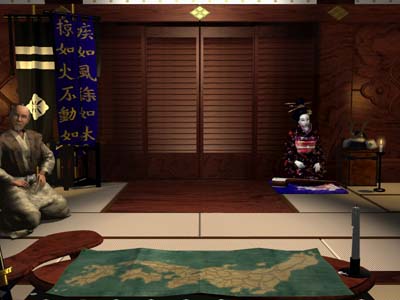 |
So, Japan was united under the
fine command of Takeda. As the banner
depicts, the army of Takeda used fine tactics and strategies and destroyed
everything on their way.
Takeda Nobutora, however, intended to pass down his throne to his second son. After some struggles, he was finally expelled by Takeda Shingen. Rumors said he was sent to Chosen (Korea)... Takeda Shingen's oldest son also tried to rebel against his legendary father. Of course he failed - and this time the son was later ordered to suicide... Anyways, this is the end of the Takeda Campaign! |
Harvest of 1544: Normal. Tax rate = 75%. Budget = 13590 koku.
Final Harvest Count: Very Good x 0, Good x 4, Normal x 6, Poor x 5, Very Poor x 0.
Final army count: 3599
Clan Takeda Hall of Fame
(Only taisho on the log files are listed. # of log files = 40)
|
Name |
Rank | Win / Loss | General's Kill | Kill Total | Loss Total | Kill / Loss Ratio | Major Deeds |
| Takeda Nobutora (daimyo) | 6 | 32 / 0 | 3.9 / 54 | 261/ 3659 | 144 / 2021 | 1.81 | Leader of Takeda |
| Takeda Shingen (heir) | 6 | 46 / 0 | 7.0 / 56 | 566 / 4529 | 225 / 1801 | 2.51 | Legend |
| Amari Torayasu | 4 | 12 / 0 | 0.3 / 1 | 183 / 550 | 60 / 181 | 3.04 | Bingo, Suo |
| Akiyama Masakatsu (killed in Yamato) | 3 | 5 / 1 | 0.5 / 2 | 187 / 749 | 158 / 633 | 1.18 | 2nd Loyalist, Totomi, killed by Oda Nobuhide |
| Yokota Yoshinobu (killed in Ise) | 3 | 5 / 0 | 1.0 / 2 | 248 / 496 | 336 / 671 | 0.74 | 3rd Loyalist, Echizen |
| Sanada Yukitaka | 3 | 5 / 0 | 0 / 0 | 33 / 33 | 5 / 5 | 6.60 | Tosa Castle Assault |
| Saigusa Hidehisa (killed in Echigo) | 2 | 3 / 0 | 0 / 0 | 41 / 82 | 38 / 75 | 1.09 | Shimosa Castle Assault, Kozuke |
| Sanada Kiyomasa (killed in Echizen) | 2 | 2 / 0 | 0 / 0 | 37 / 37 | 48 / 48 | 0.77 | Killed Imagawa Yoshimoto |
| Naito Shiro | 1 | 1 / 0 | 0 / 0 | 55 / 55 | 26 / 26 | 2.16 | Aki Castle Assault |
| Hiraga Yoshichika (killed in Harima) | 1 | 1 / 0 | 1.0 / 1 | 38 / 38 | 15 / 15 | 2.53 | Hitachi Duel |
| Amari Nagamasu (killed in Echizen) | 1 | 1 / 0 | 0 / 0 | 9 / 9 | 8 / 8 | 1.13 | Kaga Castle Assault |
| Sanada Takamasa (killed in Mikawa) | 0 | 0 / 1 | 2.0 / 2 | 143 / 143 | 150 / 150 | 0.95 | Killed by Imagawa Yoshimoto |
| Obata Genshin (killed in Totomi) | -1 | 0 / 1 | 0 / 0 | 0 / 0 | 0 / 0 | N/A | 1st Loyalist, forced to retreat |
| Average or Total | 113 / 3 | 3.0 / 118 | 260 / 10380 | 141 / 5634 | 1.84 | Completed in Autumn 1544 | |
| Compared to Mori (War Story 3) | 84 / 1 | 3.0 / 192 | 305 / 19490 | 128 / 8165 | 2.39 | Completed in Spring 1550 | |
| Mori Saigo Iezane | 5 | 27 / 1 | 1.0 / 25 | 290 / 6949 | 102 / 2443 | 2.84 |
Takeda Shingen was undoubtedly the outstanding general among all. His father could only make half as many of kills as him (because Shingen was ordered to command all the larger battles). The majority of the lower-ranked generals of Takeda had given their lives in the campaign. The most common reason was that they joined the battle commanded by another taisho higher than his rank due to the insufficiency in soldiers.
Comparing the Takeda Campaign with Mori (war story 3), we can see that Takeda fought slightly worse than Mori (with a significantly lower kill/loss ratio). However, Takeda finished the campaign faster!