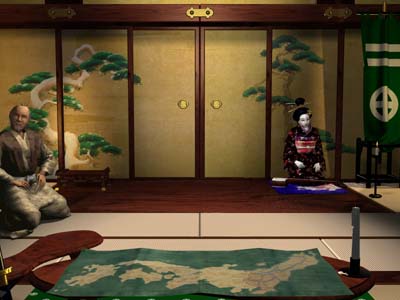
STW War Story IV : Revolution - Ronins Take Over
Chapter 2 Chase
The first three seasons of the revolt was a complete sucess in Kinki. With Oda Nobuhide destroyed, the elite troops of Yamashiro, with the help of west Oda, now took over the attack of Mori. The Ise army with east Oda had defeated Imagawa Yoshimoto. If no reinforcement arrives in Totomi, Imagawa will perish in a few seasons.
The rebel decided to launch a great attack in Mimasaka - combining almost the entire army available nearby. Mori Motonari is currently in Iwabi - if he decides to stay, the Mimasaka will be taken very easily (with the help of Yamashiro monks), and Motonari will be isolated once the rebel take Hoki. Mori Motonari better choose to defend Mimaska himself - while he will be inferior in number even so.
Also, the Kyushu invasion force has been joint by fresh recruits in Tosa. R2 general Shima Tadayo had agreed to command this decisive battle in Bungo against Shimazu Takahisa. General Shima Tadayo was impressed by the rebel's performance in the victory of Bungo in spring!
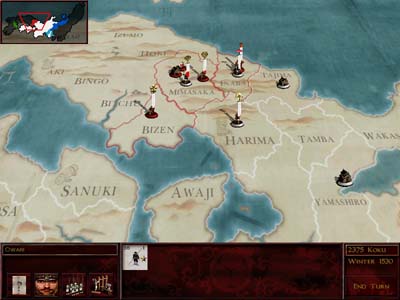
Winter 1530
Bungo: ![]() Rebel (R2, 309) vs.
Rebel (R2, 309) vs. ![]() Shimazu (R3, 191)
Shimazu (R3, 191)
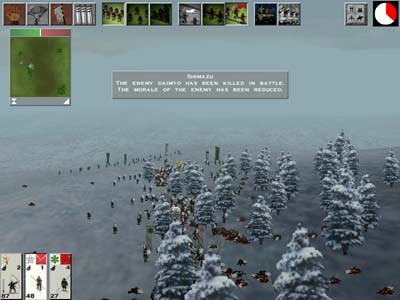
The second attack of Bungo - this time the rebel had largely increased its size - essentially taking the entire army of Shigoku to Bungo. On the contrary, Shimazu Takahisa only drew 60 men in addition into Bungo. The Shimazu army was consisted of 1 YS, 2 SA (each with 60 men), and daimyo Shimazu Takahisa.
The rebels scouted that the Shimazu army were now hiding in the forest on the right. General Shima ordered all army to proceed up immediately - but in the meantime the Shimazu archers had moved forward to shoot...

As the yari samurai of Tosa attacking face-to-face, the yari ashigaru charged from above. Two out of three of Shimazu units were surrounded - with height disadvantage. The other unit of shimazu archers were hidden at the back, shooting at the rebel taisho's archers.
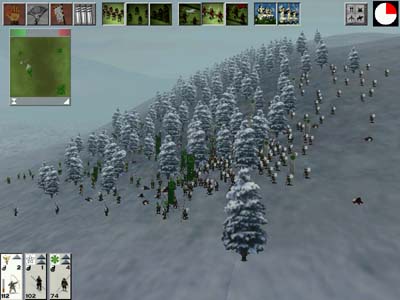
Although Shimazu was surrounded, lord Shimazu had himself came forward to assist the fight - his heavy cavalry could help very little, yet he greatly encouraged his men. Gradually Shimazu became winning, and the rebels started to waver. To alter the situation, the rebel geeneral Shima Tadoya decided to charge in - towards the enemy archers from above. The presence of the taisho also raised the morale of the rebels - and finally the Shimazu soldiers were depleted in the forests!
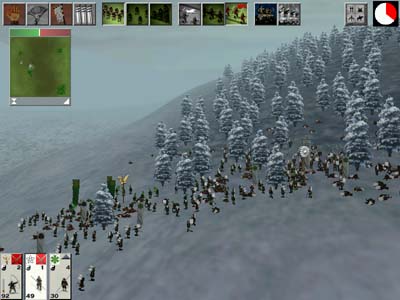
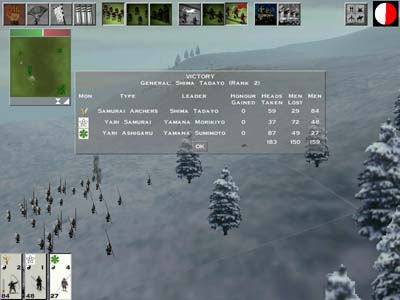
Trapped in the woods, Lord Shimazu Takahisa was killed along with all of his yari samurai and bodyguards. The Shimazu archers attempted to flee, but many of them were caught by the fine ashigaru of Tosa and left their corpses buried by the snow...
With the fall of Shimazu Takahisa, the previous generals of Shimazu also agreed to join the rebel - now the rebel force grow even stronger!
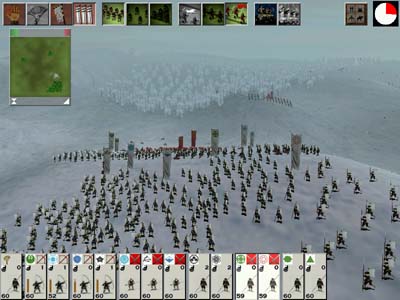
Mimasaka: ![]() Rebel (R1, 840) vs.
Rebel (R1, 840) vs. ![]() Mori (R3, 551)
Mori (R3, 551)
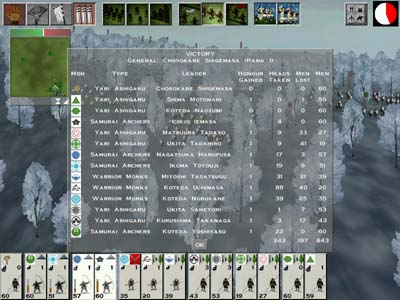
Perhaps the largest battle since 1530 - the vast amount of rebel forces confronted Mori Motonari in Mimasaka. The Mori army were higher in quality again (led by their daimyo), but the large number of rebel ashigaru were supported by the monks of Yamashiro (although quite average in quality).
The Mori army, as they usually do, camped in the forest near the end. The hill besides it were higher - providing an excellent point for the rebel archers to shoot. One group of Mori archers marched up, attempting to charge - and soon this stupidity was proven under the massive rush of rebel monks!
The rush did not stop - the furious monks went all the way in the forest under the rain of Mori's arrows. Finally the monks had a full-scale impact with the Mori army withint the trees. The ashigaru of rebel soon followed - blood everywhere in the forest!
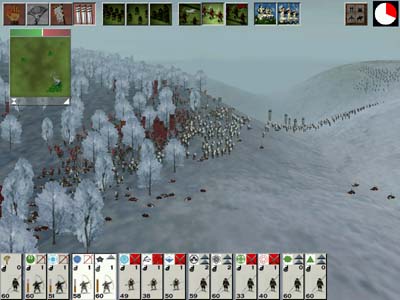
Yet the rebel ashigaru wavered very fast. The ashigaru general, Chosokabe Shigenmasa decided came forward to encourage his men. Finally Mori's men routed first!
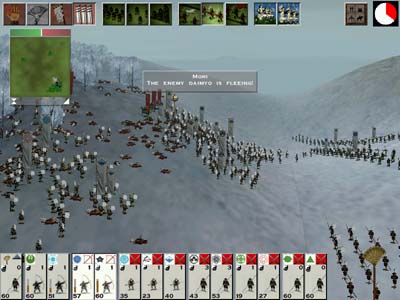
With their retreating path secured, Mori Motonari successfully escaped into the Mimasaka castle. The battle caused almost half of the lives of the brave warrior monks of rebel - but the meaning of the victory was much greater. If Mori Motonari was not rescued - the entire Mori clan will also collapse!
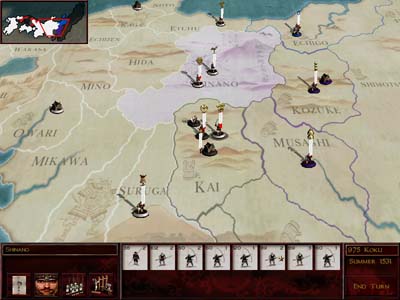
Shinano: ![]() Rebel (R1, 359) vs.
Rebel (R1, 359) vs. ![]() Uesugi (R0, 209)
Uesugi (R0, 209)
As Shinano was emptied to attack Totomi in Autumn, Uesugi had ordered his men to take it back. Now the army of eastern Oda and new recruits of Kaga had arrived to rechallenge the Uesugi army again.
The general in charge of this mission was Ichijo Uchimasa, who successfully destroyed the archers in Hida last season with 31:1 kill ratio. This time, he even routed the enemy before any contact.
Spring 1531
The new year of 1531 has come. With no rescue action from Mikawa, Suruga, and Hizen, Imagawa Yoshimoto instead ordered an assassination on the rebel R2 general Ichijo Takaie (from Shinano and Totomi victory). The ninja failed as the odss were very low.
Summer 1531, Imagawa formally collapsed as Imagawa Yoshimoto and his men starved to death in the castle of Totomi. The rebel force then soon march towards their next target - the Takeda in Kai!
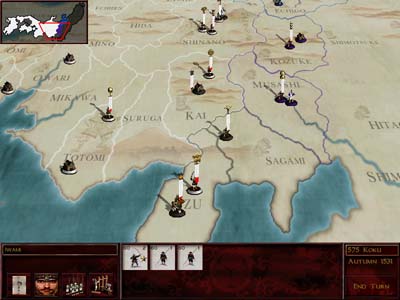
Kai: ![]() Rebel (R2, 648) vs.
Rebel (R2, 648) vs. ![]() Takeda (R3, 491)
Takeda (R3, 491)
The move was acutally quite risky for the rebels. The rebels were not really numerically superior than Takeda, who even holds more than half of their army as cavalry. Yet Takeda Nobutora suddenly ordered an retreat. The Takeda army fled out of the battlefield...

Autumn 1531
The rebel force soon chased Takeda Nobutora to Izu, this time Nobutora retreated in advance to Sagami. So the final battle against the Takeda should take place in Sagami...
On the west, with no help outside, Mori Motonari's large army also perished in the castle of Mimasaka, 2 seasons after Imagawa Yoshimoto. The entire western Japan is left with the three provinces from Takeda - and the invasion of rebels soon began. The Takeda forces had no chance to stand in front of an 1000 men army. The victory in Bitchu and Bungo was obtained without a fight.
Winter 1531
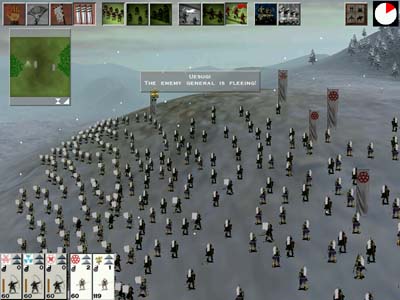
Sagami: ![]() Rebel (R3, 927) vs.
Rebel (R3, 927) vs. ![]() Takeda (R2, 311)
Takeda (R2, 311)
The two free victories in Kai and Izu had made the monk general of Ichijo Uchimasa a quite famous one. Combining the reinforcement from the west, the entire rebel force of 927 now march into Sagami...
The Takeda retreated again! This time they had exactly nowhere to flee (obviously they did not prepare the ships to Aki). All of the remaining 311 eastern Takeda ended up in the bay of later Tokyo. Takeda was defeated without any real battle. The endless chase of the rebels completed crushed the will of Takeda Nobutora. The western Takeda in Aki soon surrendered and join the rebel force!

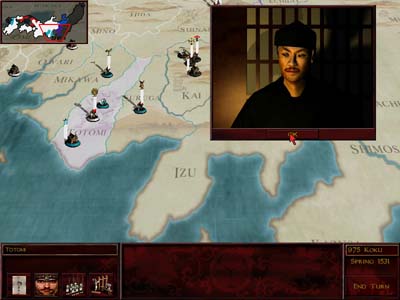
Two years of revolution - Japan is left with only two greedy daimyos of Hojo and Uesugi. The two clans had formed an alliance to resist the rebel - and the combined Hojo-Uesugi force was really a good match in numbers (~3000) with the rebel. Can the rebels overthrow these two rich powers in a short time given its limited financial income?