Heavy cavalry are the lesser brothers of the knights. While the knights may
be more powerful on the charge and have higher morale, heavy cavalry are not
automatically worse. Heavy cavalry are easier to control because they are not
impetuous or in possession of the knightly arrogance that can lead to disaster.
Some units of heavy cavalry are disciplined which gives them another advantage
over the unruly knights. Heavy cavalry are armed with a wide variety of weapons,
unlike the knights who, barring a handful of exceptions, have lances. This gives
them a wider range of roles than the rather one trick knight. Some heavy cavalry
use axes and maces and this allows them to pierce armour, making them deadly
when used against knights and other heavily armoured targets.
Heavy cavalry can defeat knights if you keep your head and use tactics. Charge
the knights from the rear or flank after pinning them with another unit. Where
possible target tired knights with fresh heavy cavalry as this makes your job
easier. In many ways heavy cavalry is your best bet for taking out knights with
mounted units if you do not have camels. However you should try to use spears or
polearms to take out knights and save your heavy cavalry for what they are best
at – pounding vulnerable infantry.
Like knights, heavy cavalry are the bane of sword and ranged units, also like
they are vulnerable to spears, pikes and polearms. In many ways it is easiest to
treat heavy cavalry as more fragile knights – the same tactics are relevant
and the pitfalls you should avoid are identical. Just remember that their morale
is often lower, that they are not always as tough in a fight, and that their
charge is not as devastating and you will do fine.
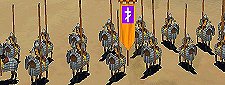
Armenian heavy cavalry
Charge 8 Attack 3 Defence 3 Armour 4 Speed 9, 20, 22 Morale 4 Cost 300 Support
cost 60
Dismount: In a siege for feudal sergeants.
Armenian heavy cavalry is elite and has a large round shield. The horse is
barded. While their charge is devastating their combat abilities are a little
underwhelming, therefore you should charge and keep pulling back and charging
again until the enemy break. This unit should not be left in a melee for very
long as it just wastes its potential. Always try to flank with this unit.
Gendarmes
Charge 4 Attack 3 Defence 5 Armour 7 Speed 9, 20, 22 Morale 4 Cost 375 Support
cost 70
Dismount: Anytime for chivalric men at arms.
Gendarmes are elite and have a large shield; the horse is barded for added
protection. Gendarmes use swords; this lowers their charge power but makes them
reasonable in a melee. More importantly they are heavily armoured and blessed
with a high defence. This enables them to sit in a melee and fight it out better
than many other cavalry types. The shield only has a 0.5 modifer.
Early Ghulam bodyguards
Charge 8 Attack 3 Defence 4 Armour 4 Speed 9, 20, 22 Morale 6 Cost 300 Support
cost 62
Dismount: In a siege for Saracen infantry.
Early Ghulam bodyguards are elite and have a large shield. The horse is
completely unarmoured and therefore rather more vulnerable than you may like.
Ghulam bodyguards are the Muslim answer to royal knights. They are the unit your
king and his heirs serve in and the numbers are made up with well-equipped and
well-trained men. There are just 20 men in each unit, 21 if the unit belongs to
a king or heir. This small number makes them vulnerable to being swamped in a
fight and cut to pieces despite their skills, this means you should always be
careful and keep them away from situations where they may become heavily
outnumbered. Ghulam bodyguards are not as good as their western counterparts as
they are statistically weaker. Since they are not knights your Ghulam bodyguards
are more controllable so it is less likely your important royal will charge into
the fray without orders and die before you can extract him to a safe location.
For best results use this unit for surgical strikes, attacking carefully chosen
targets from an advantageous position.
High Ghulam bodyguards.
Charge 8 Attack 3 Defence 5 Armour 5 Speed 9, 20, 22 Morale 6 Cost 350 Support
cost 62
Dismount: In a siege for Saracen infantry.
High Ghulam bodyguards are elite and have a shield. The horse is unarmoured.
This unit is a slight upgrade of the early Ghulam bodyguards and should be used
in the same way.
Late Ghulam bodyguards.
Charge 8 Attack 3 Defence 7 Armour 7 Speed 9, 20, 22 Morale 6 Cost 425 Support
cost 62
Dismount: In a siege for Saracen infantry.
Late Ghulam bodyguards are elite and disciplined. The horse is once again
unarmoured. Despite the lack of a shield and slightly improved stats this
upgrade of the early Ghulam bodyguards should be used in the same way.
Ghulam cavalry
Charge 6 Attack 3 Defence 3 Armour 4 Speed 9, 20, 22 Morale 4 Cost 275 Support
cost 70
Dismount: In a siege for Saracen infantry.
Ghulam cavalry are elite and have a shield. The horse is unarmoured. Ghulam
cavalry are a bit lacking in the stat department for heavy cavalry; while their
charge is effective the rest of their stats are a little too low for them to
function as traditional heavy cavalry. For best effects you need to add in a
pinch of light cavalry tactics when using this unit – only ever attack engaged
and vulnerable units. Only attack from the flanks or rear. Always make sure you
can support your Ghulam cavalry and don’t let them fight alone.
Golden horde heavy cavalry
Charge 6 Attack 3 Defence 6 Armour 7 Speed 9, 20, 22 Morale 6 Cost 525 Support
cost 50
Dismount: Anytime for Golden Horde warriors.
Golden horde heavy cavalry is elite, disciplined and have a large shield. The
horse is fully armoured. This cavalry is excellently protected and it takes a
lot to kill them unless they are attacked by armour piercing units. This unit
can charge into the fray and hold out in the subsequent melee better than many
other heavy cavalry units. Their best use is still charging into vulnerable
infantry though.
Kataphraktoi
Charge 8 Attack 3 Defence 5 Armour 7 Speed 9, 12, 16 Morale 4 Cost 375 Support
cost 105
Dismount: In a siege for Byzantine infantry.
Kataphraktoi are elite and disciplined, the horse is fully armoured. Two things
are obvious when looking at this unit, firstly it is a tank (Kataphraktoi are
sometimes referred to as katatanks! ) and secondly it is slow. Kataphraktoi are
faster than infantry but for cavalry they are snail like. Therefore you are best
off treating them as speedy infantry and slamming them into the enemy rather
than trying to pull off fancy manoeuvres. Let them charge into something and
slug it out; as long as you keep them supported they will win through.
Khwarazmian cavalry
Charge 6 Attack3 Defence 5 Armour 7 Speed 9, 20, 22 Morale 4 Cost 375 Support
cost 70
Dismount: In a siege for Saracen infantry.
Khwarazmian cavalry is elite and the horse is fully armoured. A rose by any
other name may smell as sweet (that is Shakespeare’s Romeo and Juliet for the
philistines out there! ) but a Kataphraktoi by another name is not so sweet!
Khwarazmian cavalry are Kataphraktoi with a weaker charge and normal speed.
Wearing this much armour in the desert will barbeque anyone, this unit is just
begging for foreign service as the factions capable of building this unit all
start with hot provinces. Send them abroad or use them sparingly.
Lancers
Charge 8 Attack 5 Defence 7 Armour 9 Speed 9, 20, 22 Morale 8 Cost 850 Support
cost 85
Dismount: In a siege for chivalric foot knights.
Lancers are elite and uncontrollable. The horse is so covered in armour it
clanks as it moves! When speaking of lancers it is hard to know where to begin.
They have the same stats as late royal bodyguards but there are 53 men per unit
rather than 20. This makes them the best heavy cavalry in the game and quite
possibly the only unit of heavy cavalry capable of beating knights at their own
game. Lancers will crush most infantry with their charge (as long as they
don’t have spears or pikes) and they are more than equipped to fight in a
melee if they don’t break their target. Their morale is so high they can lose
over ľ of the unit and keep going. Like knights they are impetuous and prone to
charging without orders, this is perhaps their only flaw. People play as the
Turks solely to use Janissary heavy infantry; people also play as the Spanish
and Aragonese solely for lancers.
Mamluk cavalry
Charge 4 Attack 2 Defence 3 Armour 4 Speed 9, 20, 22 Morale 4 Cost 275 Support
cost 70
Dismount: In a siege for Saracen infantry.
Mamluk cavalry is elite and armour piercing; they also have a small shield. The
horse is unarmoured. At first glance Mamluk cavalry seem unimpressive, that is
until you spot the armour-piercing bonus. Mamluk’s are equipped with an axe
and this allows them to make a good job of killing armoured units. Your best bet
is pinning an armoured unit with another unit and charging your Mamluks in from
the rear to cut them up. With the aid of some simple spears Mamluk cavalry can
and will destroy fancy units of knights and other heavy cavalry in this way.
Mamluks don’t handle unarmoured targets very impressively, there are often
many better units to send after the lightly armed targets.
Ottoman Sipahi
Charge 4 Attack 2 Defence 3 Armour 4 Speed 9, 20, 22 Morale 2 Cost 200 Support
cost 65
Dismount: In a siege for Turcoman foot.
Ottoman Sipahi have a small shield. The horse is completely unarmoured. Ottoman
sipahi are equipped with swords, this is why their charge is so low. This unit
is rather weak for heavy cavalry but they can still get the job done. Just make
sure you attack from a flank or something.
Pronoiai Allagion
Charge 6 Attack 4 Defence 3 Armour 5 Speed 9, 20, 22 Morale 8 Cost 425 Support
cost 125
Dismount: In a siege for Byzantine infantry.
Pronoiai Allagion are elite and have a large shield. The horse is barded for
partial protection. Pronoiai are the Byzantine version of feudal knights, they
share the same high morale and equipment. There are only three differences: The
first is in the weapon; while feudal knights have lances the Pronoiai only have
spears. The second is that Pronoiai have a single point more armour. The third
is that they are not impetuous. You can use this unit in the same way as feudal
knights and they will perform well, however they will take a few more losses and
do a tiny bit less damage when compared to their knightly cousins.
Teutonic sergeants
Charge 4 Attack 3 Defence 5 Armour 6 Speed 9, 20, 22 Morale 4 Cost 375 Support
cost 40
Dismount: In a siege for Order foot soldiers.
Teutonic sergeants have a shield and a sword. The horse is unprotected. This
unit has very good defences and a tolerable charge and attack. For best effects
you should charge them into the rear of an engaged unit and let them hack it out
in the melee. The shield only has a 0.5 modifier.